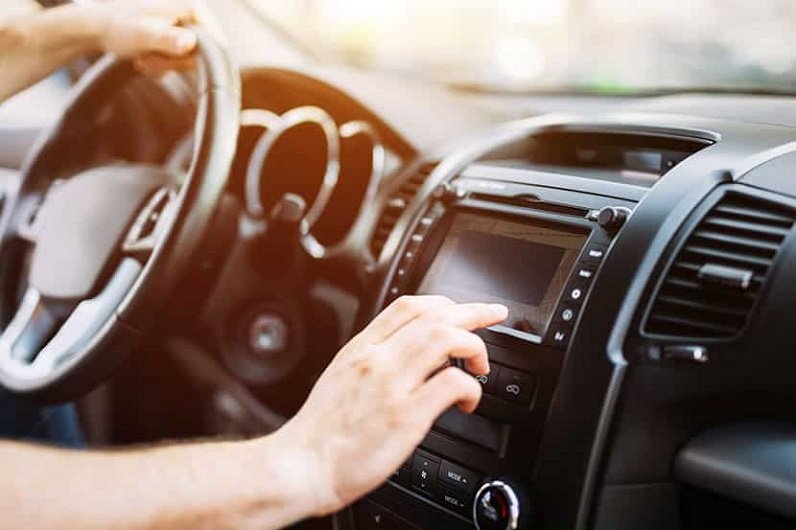
You are a music lover. And you just can’t seem to let 1 minute pass by without your favorite songs rocking you on. How much more when you are on the road.
Your car stereo would be your most favorite companion, playing your preferred artists and your well loved genres of music.
As the music plays on from your car stereo, it makes you alert and more focused on the road. But then… Snap! Out of nowhere, your car stereo drops out and suddenly stays silent.
What could be the problem?
There are many reasons why your car stereo suddenly stopped working. But don’t stop in the middle of nowhere while driving to figure out the problem.
Stop over in a populated and well lighted area and figure out what’s wrong.
It could be a shorted or grounded wire. The speakers could be defective or busted. The head unit could be faulty or some fuses could have blown. Or the set-up of your stereo unit (especially if new) was set on minimum level on some settings which disabled the music volume.
The music lover in you would surely be frustrated. Without catchy sounds, you’re not just into your element. Don’t worry, you are in the right place. Find out what are all the possible causes of a faulty receiver and how to fix a car stereo that has no sound!
How to fix a car stereo that has no sound- all the possible causes why your car stereo suddenly stopped operating:
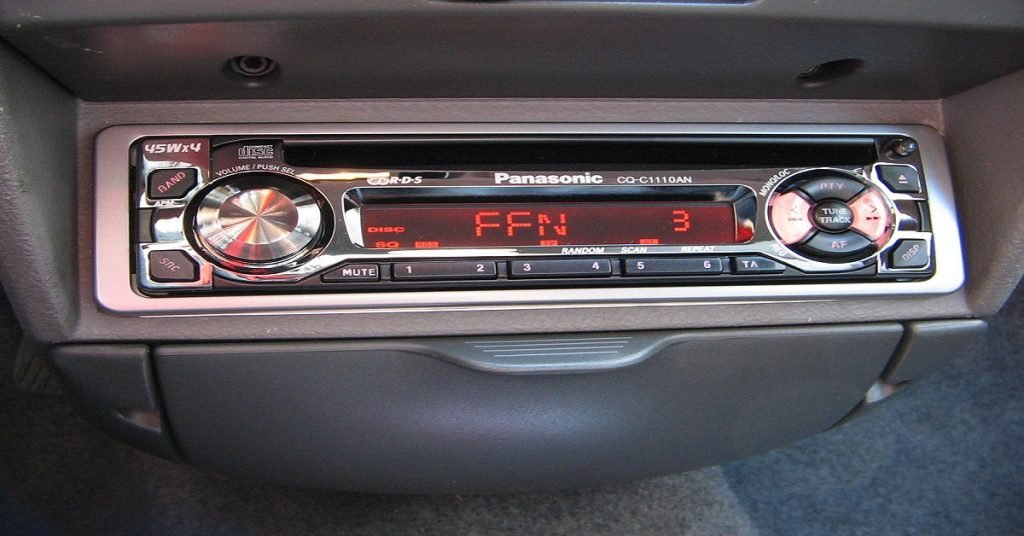
Systematic Wire Organization
Car radios will surely have wires jutting in and out of the unit. Each wire serves a purpose and the mere fact that one or more of them are not hooked up properly will make your car stereo go silent.
There are 3 different power wires going into the deck part. By standardization, the black wire is the ground, the red wire is connected to the battery and the yellow wire enables constant power.
If these 3 wires are hooked up properly, then they are not the source of the problem.
When everything looks to be in order in this aspect, it’s time to move on to another possible culprit.
Check The Sound Settings
It would be either just static or no sound at all coming from your car stereo. Start by listening intently to your car audio with the sound on medium level.
If the sound is working right, you can be able to hear something but it will be not so loud and your car will not be vibrating from the sound because you just set it on medium level for checking it out.
Car stereos have all sorts of settings to improve the music sound quality. These settings include the volume, fader, listening position (balance), and frequencies.
If you want to solve your car stereo dilemma at this point, you need not go deeper into other causes why it won’t work.
It’s a bit silly, but if you set to 0 all these settings, you will completely disable all sounds coming from the speakers.
Make sure all the frequencies are up and about. Adjust the fader settings to play some music through the front and rear speakers.
After every sound setting has been tested and verified – the volume is blasting, the radio is not on mute, and the fader and the balance have been tested – you should have sound coming out. If not, move on.
Check Speaker Wires and Overall Condition of the Speakers
Navigate around the car. Make sure you pay attention to each and every speaker in every nook and cranny. You will be able to distinguish a clear auditory difference between working and non-working speakers.
Once you know what speakers are not functioning, you are now on the next step to determine whether it’s the speaker itself which is defective or something else is triggering the soundless issue.
Now, it’s time to check the wires of the speakers if you haven’t figured out what’s wrong yet. You have to disconnect the car stereo’s connection to the car battery before attempting to touch the wires or any electrical component.
Actually, it’s a repetitious process of connecting and reconnecting the connection with the car battery every step of the way. You have to protect yourself from electrocution.
Most aftermarket wirings of speakers will be labeled on their sides with descriptions of where they should be connected. Although, some stock wirings will simply be just color-coded or they could also have labels or descriptions.
By this time, you might be necessitated to remove some dash panels so that you can check the speaker wires and the speakers themselves properly.
There should be a set of positive and negative wires that connect to each speaker.
If linked properly, the car stereo should kick up and play your brand of music or the news and provide the power needed to let the acoustics of each one of your door speakers and the rear speakers function.
It should be that you have 1 positive or (+) wire and one negative or (-) wire touching each of the posts on the speaker.
If they are not touching, while your car’s ignition is in the accessory position, touch the loose wire to the post with no connection. When something magical happens and your favorite songs come to life, your troubles are over.
If nothing magical happens, move on. If you are also using an aftermarket amplifier, make sure it is also getting its power requirements.
Don’t return the dash panels just yet. You have some more checking to do! It would be possible that only 1 speaker is producing sound and the other doesn’t. You checked the wiring but it’s properly connected, so why no sound?
Now, check the speakers themselves diagnostically. Are there punctures on the cone? Are there scratches or are there bent parts?
See if there are any physical evidences of damage. But punctures on the cone will not totally silence the sound but will distort it.
By this time, if the speakers are not the culprit, it’s not necessary to return the panels which you removed because you might need to put them back again. DIY work is routine and should be comprehensive, so you won’t have to retrace your steps.
Just make sure you know the pattern of putting back the panels correctly again.
Let’s move to the other suspects which seem to evade us. Let’s see if the fuses are the guilty parties.
Check the Fuses
This could also be one of the probable causes of why your car stereo suddenly stopped working. Most cars have 2 fuse panels – one of them is inside the vehicle and the other one could be located under the hood somewhere in the engine bay.
In the interior of the car, the speaker fuses could be possibly near the floor on the passenger side. Opening the cover will show you all the fuses. If you will look at the backside of the cover, there should be a diagram of all the fuses.
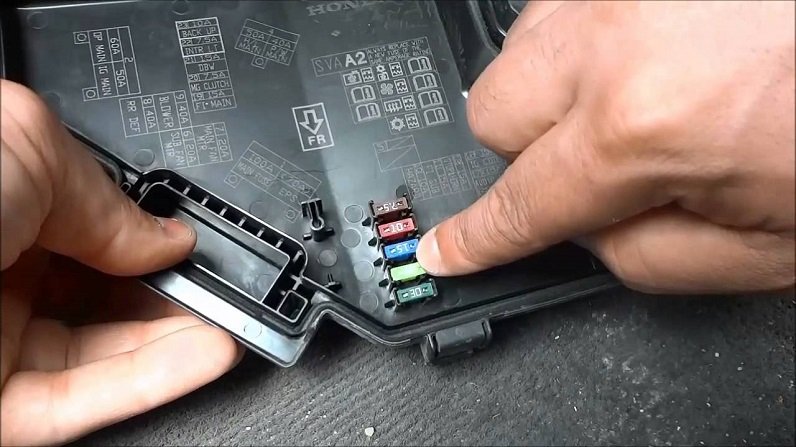
Check each fuse that is associated with car audio. The usual abbreviation that is applied is SPKR which stands for speaker. Be patient and pull out one fuse at a time and check if it isn’t burned or blown.
If by chance any fuse is broken or burnt, replace it with a compatible fuse. If you discovered a broken 10 amp (usually red) from a specific slot in the diagram, you should replace it with a similar 10 amp fuse. Never put in a fuse with a different amp.
Once you’ve inserted the necessary fuses, turn your car’s ignition to the accessory position. This means your internal electronics and electric components will be operational.
If the wonderful sound of music could be heard wafting throughout the car, your car stereo troubles are over. If not, move on to the other suspects in the rogue gallery.
At this point, you need an Ohm Reader
AstroAI Digital Multimeter with Ohm Volt Amp and Diode Voltage Tester Meter Continuity Test (Dual Fused for Anti-Burn)

Key Features:
- ACCURATELY MEASURES: AC/DC Voltage.
- TROUBLESHOOTS SAFELY: Automobile and home electric issues securely and accurately; Overload security on all ranges.
- Owners Manual is written in clear English. Questions, as well as a help card, included.
- 1 Year Warranty with excellent customer service from the seller provided.
NOTE: This meter can not test AC Current; Ensure your multimeter is set to the correct setting before testing
PROS
- Very practical and beginner-friendly product.
- Very accurate product, worth every penny.
CONS
- I would not recommend using this product on anything that carries mains voltage or can put out a lot of amps, however, simply because of the lack of fuse on the 10A input and the creepage.
Things are starting to get a little complicated here. If it isn’t the wires, the speakers, and the fuses, it will be something else. The one thing that will make you happy right now is to hear sweet rocking music from your car stereo and it’s not happening.
Test each piece of wire with your ohm reader to see if they’re getting enough power. If there’s power, move on to the next step.
Set your ohm reader into voltage mode. Do a quick internet search on the correct voltage that the wire should be reading.
If the reading is lower than required, or there’s no power, something is lurking behind the car stereo that’s the culprit behind the fact that you’re not getting your music.
The next step is you’re going to check the wires again, but it will be different because you will be using the ohm reader. One scenario would be, is there would be power, but what’s puzzling is that the speaker is still not working.
Check between the radio deck and the speaker. Follow the wire until you see a break. Aha, if it’s broken, cut away a 2-inch section and with the use of a pigtail or a butt connector, add in a new piece of wire.
Solder or crimp shut the new wire in order for the connection to the old wire to be sealed.
Do this process for any wire connection from the car stereo to the other speakers until every wire is shut tight or soldered. If it is necessary, do the necessary wire replacement of an entire wire connection if it’s really dilapidated.
Another Speaker Testing is in the works
Wires are now replaced or reconnected properly. Blown fuses have been replaced (with the same amp). And the ohm reader says that everything important has power going into them. What’s next? Test the actual speaker!
To do this, you need an AA size battery and 2 pieces of wire. Take the speaker out (do this to every speaker, one by one), take 1 wire piece, and hold it to the positive tip of the battery and the other wire piece, let it touch the negative tip of the battery.
Touch the opposite sides of the 2 wires to the corresponding terminals on the speaker. Positive to positive and negative to negative.
If this is successful, and the battery juice gives the speaker power, the speaker will move and flex up and down to your music.
But if there is still no sound coming out, the sad truth faces you. Your speaker is badly damaged and needs to be replaced. You did all you could, DIY style, to repair your car stereo, and your final conclusion is your speaker is busted.
New Speaker Installation
You have determined that your speaker is the culprit. You would not have gotten this far and this long a period of time because you checked everything and it all boiled down to the speaker being busted.
Buy the same size speaker as the old one. For example, if the old one is a 6.5″ speaker, buy a 6.5″ new one too. And just follow the installation instructions. It will be a breeze!
Conclusion
Your car stereo is your best non-human friend on the road. It keeps you alert, it keeps you rocking to your favorite tunes and it just simply makes you happy.
Being able to repair it DIY if it conks out won’t be a problem for you anymore when you follow the steps here. Make sure you also have the tools needed in your car, like the ohm reader, so that anytime, you’ll be prepared when your beloved car stereo goes soundless.